

Create multiple user accounts under one master business account
Shared Pay | Groups | Approvals
Benefits of Adding Team Members:
-
![Amazon business]()
Prevent Sharing Login credentials
-
![Amazon business]()
Reduce Dependencies on Admin
-
![Amazon business]()
Set up Team Policies
-
![Amazon business]()
Access to Bulk Discounts & Offers


Unlock new features by adding Team Members


Below are the Steps to Add Multiple Users to your account:
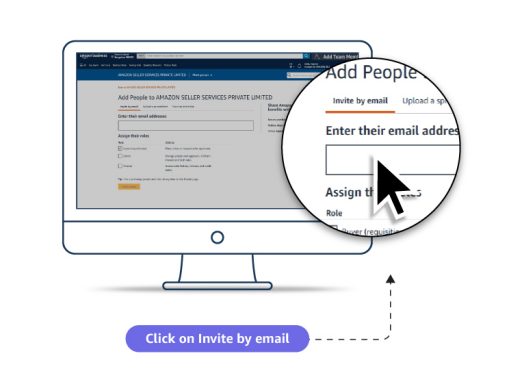
Step 1: Click on Add Team Button on the top of Navigation Bar

Step 2 : Select option to Send Invite
-
![Amazon business]()
Invite by Email
To add a new user by email, enter the user’s email address and select the appropriate user permissions. Up to 20 people can be invited in this window at once.
-
![Amazon business]()
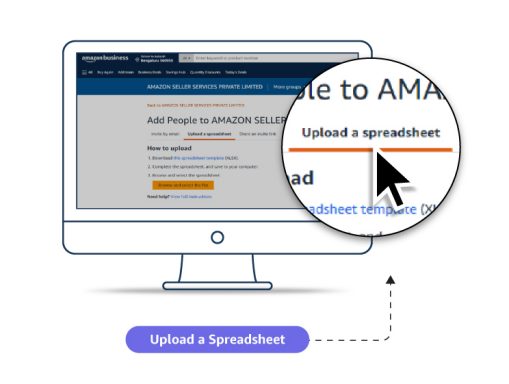
Upload a Spreadsheet
To add multiple users via spreadsheet, you can use the provided template in your settings. Invite multiple users to different groups, and designate their roles on a group-by-group basis. After the spreadsheet has been uploaded, the admin will receive an automated report indicating any emails that were not able to be processed or invited. If an entry was unable to be processed, this report will provide more details on the error so that you can fix it and try again.
-
![Amazon business]()
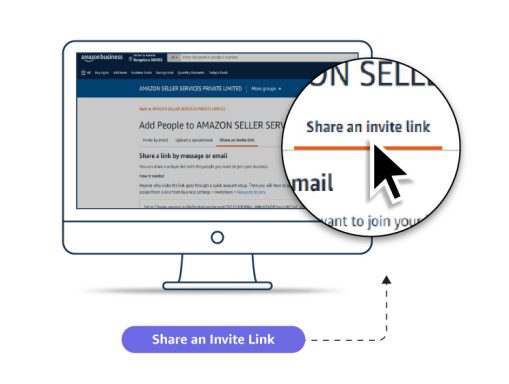
Share an Invite Link
To add a new user by sharing a new link, you can copy the link provided. This link is unique to your account, and will have its own URL. This method is helpful if you don’t have your user’s work email address handy. Share the link using your favorite method of work communication such as email, work messaging platform, or even send the link via text message.
Once your user clicks on the link, they can specify which email address they want to use for their business account login
Step 3 : Assign Roles to Team Members
Users (People) are part of a business account, and have one or more roles. Each customer has an Amazon Business account with their own email address and password.
-
![Amazon business]()
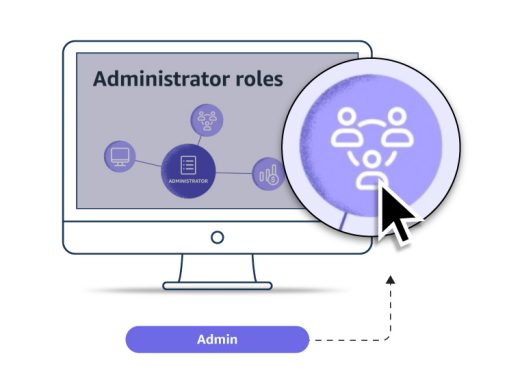
Administrators
Administrators manage business accounts. For example, they can invite other users to join the business account, and manage shared payment methods, shipping addresses, and delivery preferences.
-
![Amazon business]()
Requisitioners
Buyers (Requisitioners) place orders for the organization after they are assigned permissions by the Administrator.
-
![Amazon business]()
Tech users
Tech users manage domain names, authentication methods, API keys, and IT system integrations such as purchasing systems, transaction data, and single sign-on.
-
![Amazon business]()
Finance users
Finance users access, customize, and schedule Amazon Business reports.


How to Add/Remove Users?
-
Resend Invitations
Navigate to Business Settings, input the name in the search bar to which you have invited the user, and select the correct group. Once you are in the correct group, from within the Members section of your Settings page, select Invitations. Select Actions, and Resend for the invited user.
-
Removing Users
If you ever need to Remove Users, you can navigate to the user’s profile page. To find a user profile, go to Business Settings. You can locate a user through the search bar or the People section of the account. Once you have found the user, you can either remove them from a specific group, or from the business account as a whole. Extra confirmation is required to remove a user completely from the business account. Once a user is removed, they will need to accept a new invitation to regain access to the account.